

How To Apply Gelish Gel Polish At Your Home
2nd Oct 2019
So you're ready to take the plunge and decided to do your own Gelish manicure at home. But you don't know where to start and what to buy.
We try to put together in this post the Gelish application process, the products you need and some FAQs from our customers about Gelish, so you can do it yourself in the convenience of your house.
What You Need
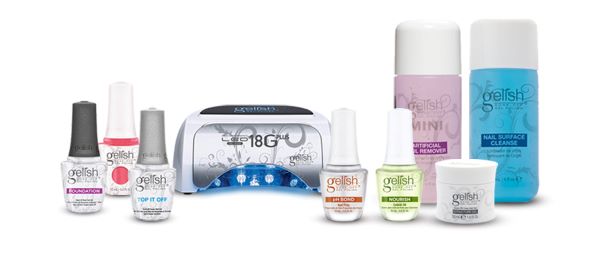
To do Gelish manicure, here are the products you needs. Some are optional.
- Gelish Foundation Base Gel
- Gelish Top it Sealer
- Gelish Cleanser (blue liquid) or CND Scrubfresh
- Gelish Soak-off Polish, any color you like
- Gelish LED Lamp or regular 36-watt UV lamp
- Gelish Remover (pink liquid) or Acetone
- Gelish phBond
- Gelish Structure Gel for weak and peeling nails
- Nail Harmony Nourish cuticle oil

Esther's Nail Center also have Gelish Basix Kit that includes most products you need to start your gel application, and Fantastic Four set that includes Base, Top, phBond and Nourish Oil. We recommend to buy in a set for a better value.
Gelish Step-by-Step Application
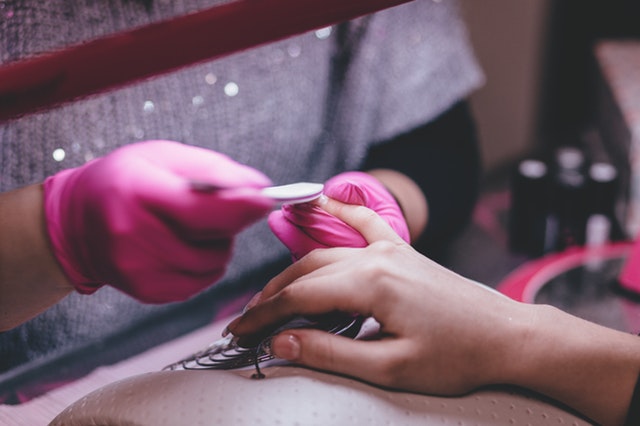
Photo by freestocks.org from Pexels
- Trim or file the nails to the length of your choice.
- Push back the cuticle and clean the surrounding plate. Use cuticle stick and CND CuticleAway for this. Follow the instruction on the bottle.
- Gently remove the shine on the nail using the 100 grit side of a 100/180 Buffer.
- Remove the dust and wipe the nail with Gelish Cleanser using a lint free nail wipe.
- Apply Gelish PH Bond to the nail plate. Apply in a very thin coat.
- Apply Gelish Base Coat – in a thin application and seal the edges of the nail.
- Place hand in the Gelish LED Light for 10 seconds or a 36 Watt UV Light for 1 minute.
- Optional: For Clients with NAILS PRONE TO THINNING AND PEELING, add the following two Enhancement Steps:
1. Apply Gelish Structure Gel in a THIN LIGHT APPLICATION from cuticle to free edge to build structure to the nail. Seal the edges of the nail & the free edge.
2. Place hand in LED Light for 30 seconds or 36 Watt UV Light for 2 minutes. - Apply Gelish Gel Polish in a thin application from cuticle to free edge. Be sure to seal the edges of the nail.
- Place hand in the LED Light for 30 seconds or a 36 Watt UV Light for 2 minutes.
- For darker coverage, apply another coat of polish and cure under the light with the same time duration
- Apply Gelish Top It Off Gel from cuticle to free edge using a thin, light application.
- Place hand in LED Light for 30 seconds or 36 Watt UV Light for 2 minutes.
- Wipe off the tacky surface residue with Gelish Cleanser.
- Apply Gelish cuticle oil to the skin surrounding the nail.
Gelish Curing Times
| Product | 18G LED Light | UV Lamp |
| Foundation Base | 5 seconds | 1 minute |
| Structure Gel | 30 seconds | 2 minutes |
| Gelish Gel Colors | 30 seconds | 2 minutes |
| Top It Off Coat | 30 seconds | 2 minutes |
Tips
1. Perhaps the most important tip is this: Shake the gel polish thoroughly before application so the gel mixes well. This will make your gel polish apply nicely. Invest in a nice nail polish shaker if you can.
2. All nail and gel polish will get thicker over time. It doesn't matter what the brand is. To care for your gel polish and prolong its shelf life, get a gel polish thinner. If your polish gets thicker than normal, just put a few drops and shake it rigorously.
Resources
We offer Gelish products for your needs. Visit our store www.EsthersNC.com for all your Gelish and gel polish needs.
- Gelish.com - the official website of Gelish, full information on the color chart and application